Self Serve Calibration Tool Help Guide
Once you have your calibration data results then you are ready to input this data into the Converge platform to enable in situ strength montioring for your mix.
The results you need are the specimen lab results for your chosen mix plus any installed calibration sensors have been read to capture the thermal profile of your specimen batch.
With this in hand input your data using the below steps.
If you do not have your calibration input data yet see Calibration prep checklist
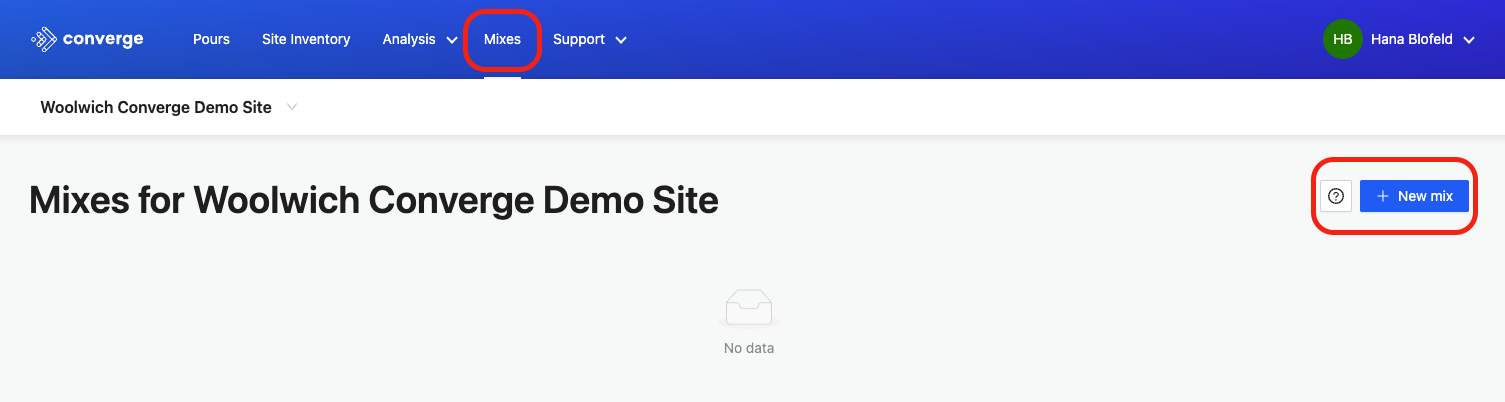
Step 1 - Create a New Mix
To monitor the strength of a mix, you must first calibrate it
Select the ‘Mixes’ tab in the ConcreteDNA platform to access the self serve calibration tool
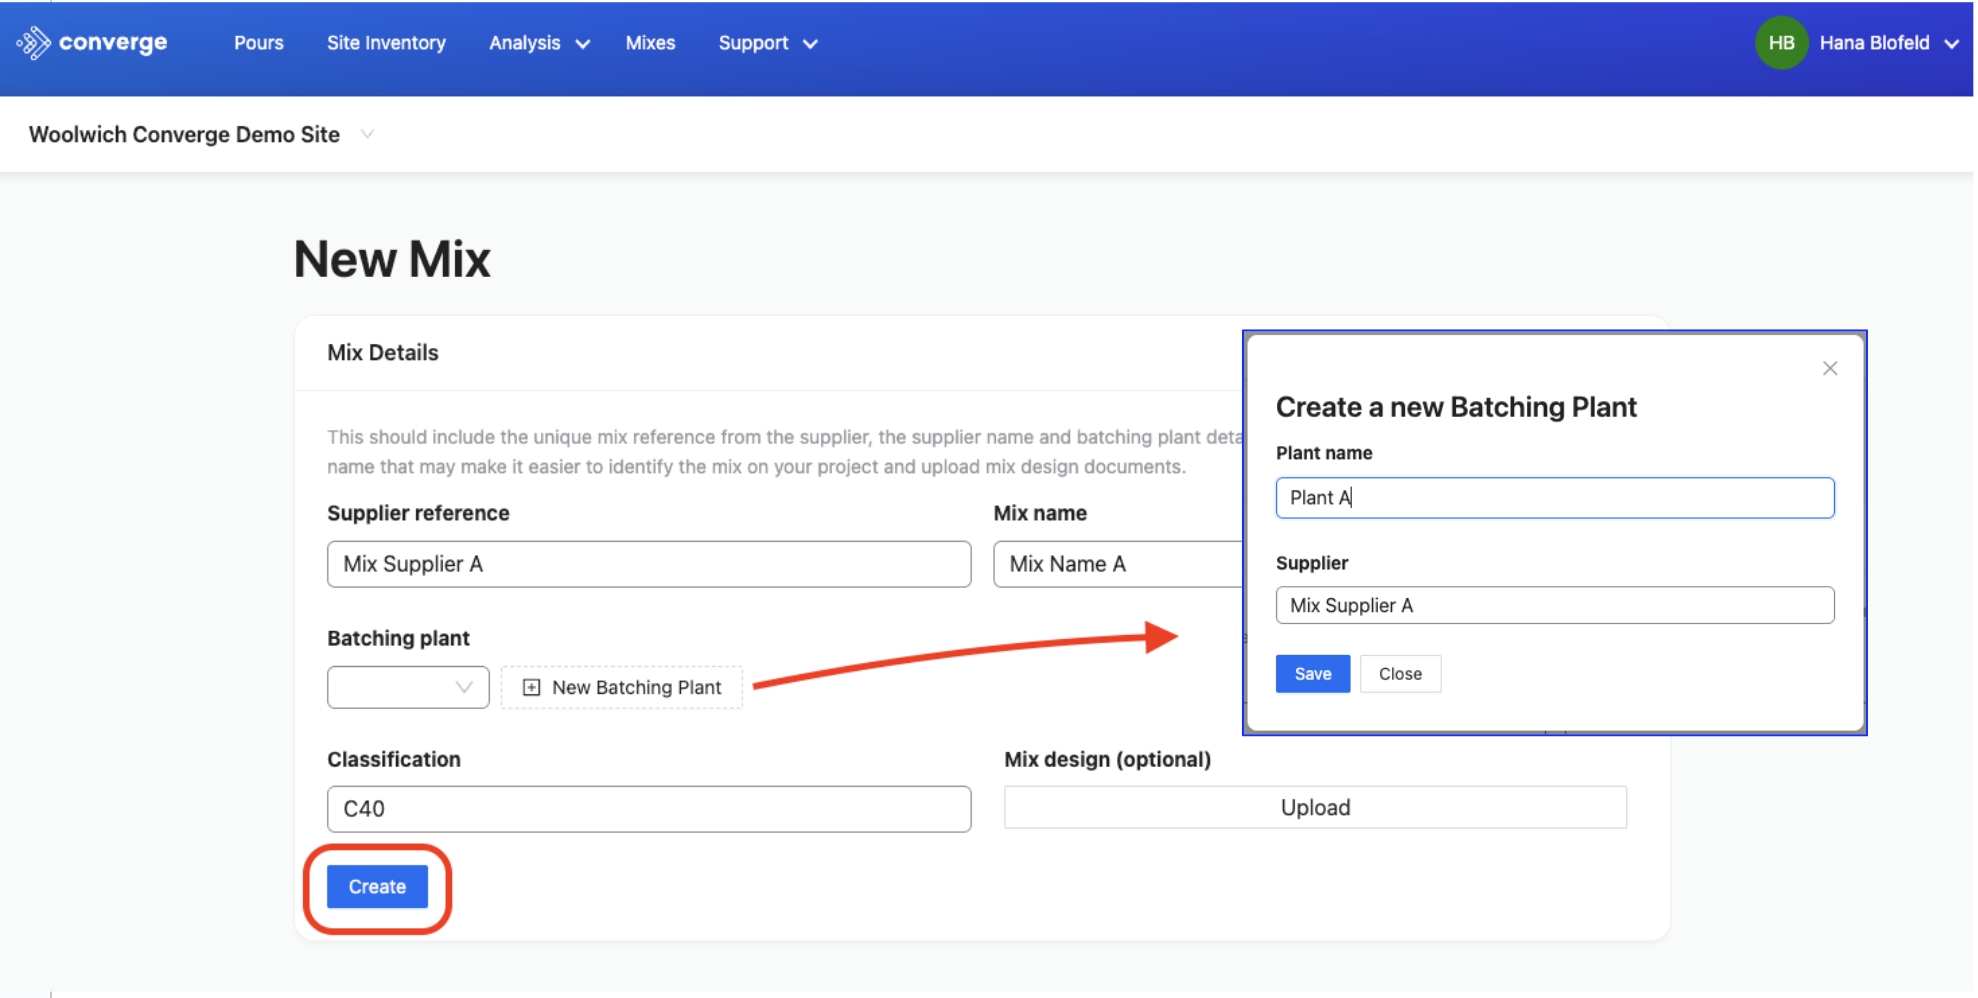
Select [+ New Mix] button to create your mix
Enter the required mix details
Tip:
✅ Upload your mix design and centralise your data
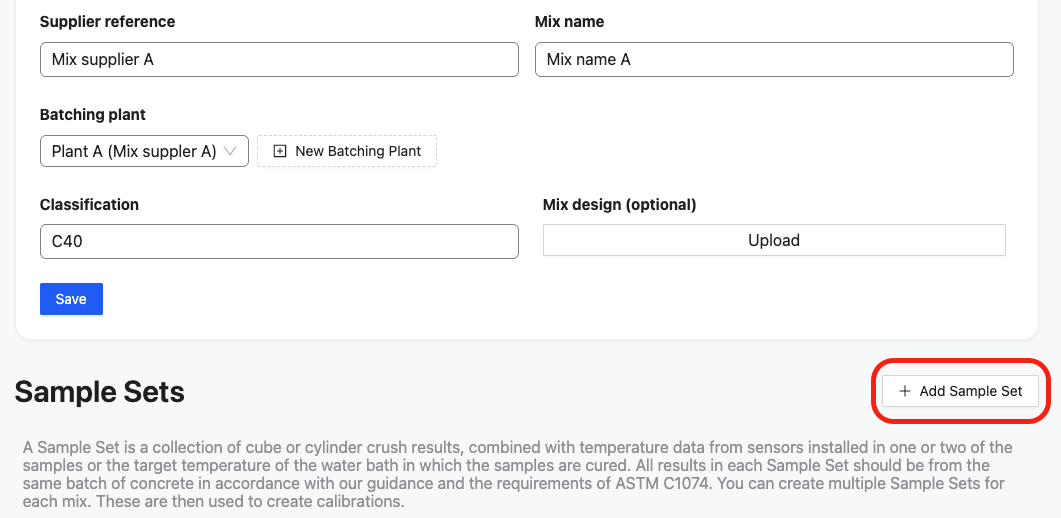
Step 2 - Add your sample set information
A Sample Set groups your crush results together with the related temperature data
Select [+ Add Sample Set] button to add a new sample set
Enter the required information relating to your specimen sample data
Select (drop down menu) to find sensors installed in specimen samples registered to your site

Tip:
✅ Use sensors if available
For the most accurate calibration, embed sensors into your samples and select them from the list of registered sensors on your site. You can select up to two sensors
ℹ️ Calibration will default to 'Target curing temperature' when there is insufficient sensor data.
Tip:
✅ Double-check sensor registration
Make sure your sensors are registered to a pour before you try to add them to a Sample Set, otherwise they won’t appear in the dropdown list.
Step 3 - Add your crush results
Use your specimen lab results report
Enter your lab results - select either date-time, hours or days to match how your lab reports results
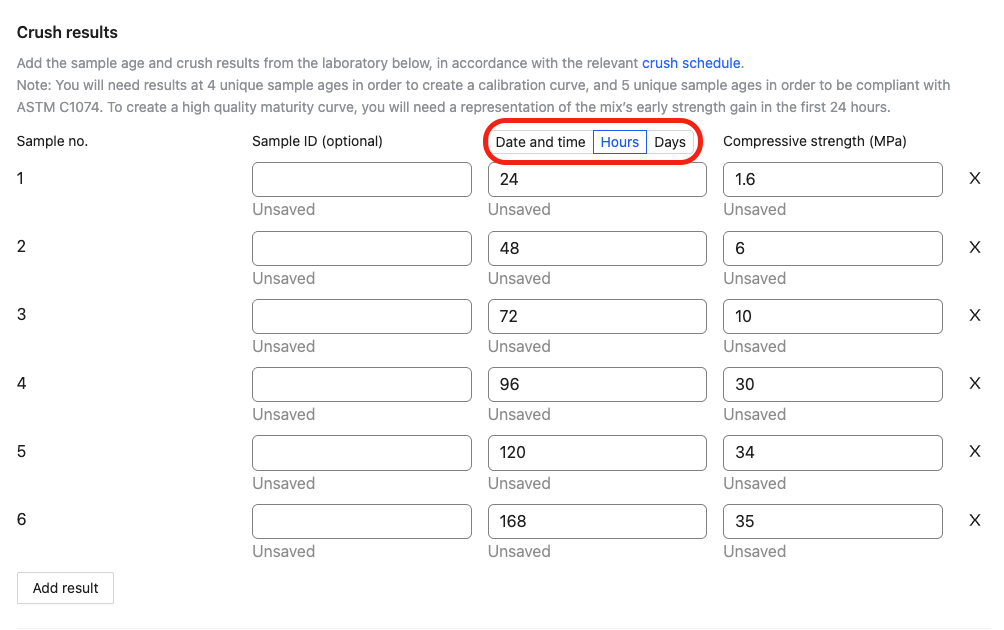
Tip:
✅ Enter the most precise data available for accurate strength monitoring in situ
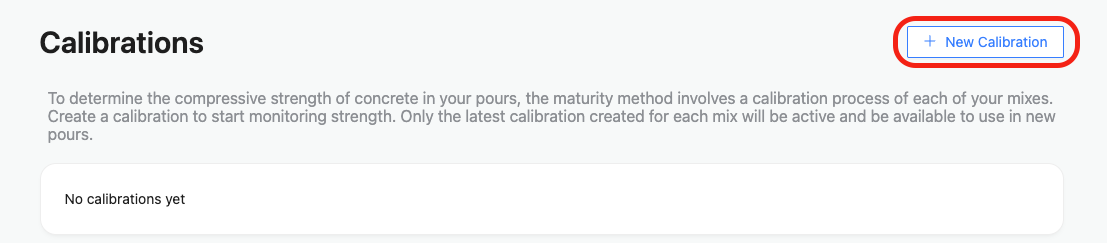
Step 4 - Add a new calibration
select your sample set and maturity function
Select [+ New Calibration]
Select maturity function you want to use*
Select sample set to include

Tip:
✅ *TheNurse Saul function is used across the world, and suitable for a wide range of mixes. This is typically considered the de-facto maturity function, and used in most cases.*
Tip:
✅ * The Arrhenius function has a parameter known as the Activation Energy, which can be adjusted to reflect the mix's temperature sensitivity. The methodology to compute the Activation Energy for a given mix can be found in ASTM C1074 (Section X1.3). This involves curing samples at multiple temperatures. The default Activation Energy in ASTM C1074 is 41,500 J/mol, but ideally samples should be cured at multiple temperatures to obtain an appropriate value for your specific mix. You can compute the Activation Energy in a separate spreadsheet - once this is obtained, enter the Activation Energy into the Calibration Tool along with the strength data for samples cured in standard conditions (eg. 20°C for samples cured in the UK). For further advice on using the Arrhenius function, contact Converge at calibrations@converge.ioso we can assist. *
Tip:
✅ *The Sadgrove function is sometimes used in the UK, and can be applied through our tool, but is not referred to in ASTM C1074. *
For more guidance on maturity functions see Maturity Curve Fitting Process
Step 5 - Create calibration
See the maturity curve generated and save selection
Select your chosen maturity curve
Select [Create Calibration]

Tip:
✅ To save you time, we recommend the best-fitting function based on your data. You can stick to the recommended or adjust it if a different fitting function better matches your specific calibration requirements.
Tip:
✅ Keep the Datum Temperature set to 0° unless otherwise specified.
Tip:
✅ All calibrations you create will appear in the Calibrations section. Only the calibration marked as Current will be available for use in the pour. Please note that any changes to the Sample Set — including adding crush results or any calibrations made using a new sample set — will invalidate the current calibration, and you’ll need to create a new one so that your pour uses the latest sample data.

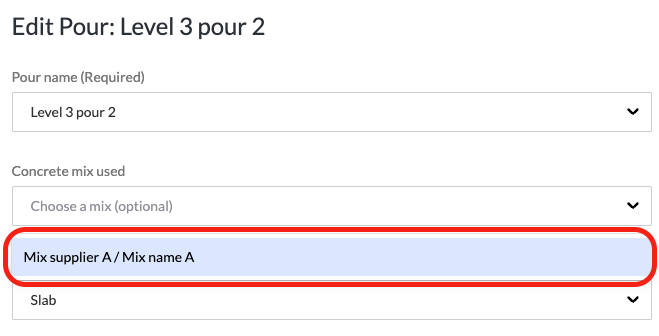
Step 6 - Select the mix in your pours to start monitoring in situ strength
The calibrated mix is now available to select in your pour
Select the ‘pours’ tab in the ConcreteDNA platform or app
Edit existing pours to add 'Concrete mix used'
Add new pours and select 'Concrete mix used'